Description
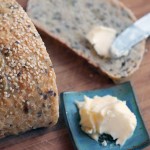
This hearty bread is full of seeds and is perfect for toasting or enjoying with a bowl of soup.
Ingredients
- 1/3 cup sunflower seeds, lightly toasted
- 1/3 cup pumpkin seeds, lightly toasted
- 1 1/2 cup lukewarm water (95°F or 35°C)
- 3/4 cups lukewarm buttermilk (95°F or 35°C)
- 5 cups unbleached bread flour
- 1/3 cup whole wheat flour
- 1/3 cup whole rye flour (or same amount of whole wheat flour)
- 1/2 cup sesame seeds
- 3 tablespoons flax seeds
- 1 tablespoon coarse kosher salt
- 2 (8-gram) packets instant yeast (4 1/2 teaspoons)
- 3 tablespoons honey
- sesame or poppy seeds for garnish
Instructions
The Day Ahead
- Lightly toast the sunflower and pumpkin seeds in a dry frying pan over medium heat. Set the seeds aside to cool.
- Meanwhile, combine the water and buttermilk. Heat the liquid gently in a pot on the stove, or in the microwave on medium setting. Check the temperature with an instant-read thermometer (you are aiming for about 95°F or 35°C) to ensure you don’t kill the yeast with liquid that is too hot.
- Combine flours, seeds, salt, yeast, honey, water / buttermilk mixture in a large bowl. Mix by hand or using the paddle attachment of a stand mixer on low speed for 2 minutes. The dough should be sticky. Let stand 5 minutes.
- Change the paddle to a dough hook and mix on medium-low for 3 to 4 minutes. You can also continue to mix by hand, but I find this too hard on my wrists. You want the dough ball to hold together, but be soft, tacky and slightly sticky. You may need to add a bit more flour or water to get this consistency.
- Knead the dough by hand on a floured surface for 3 minutes, adding more flour as needed to prevent sticking. The dough should be slightly sticky but still form a ball.
- Place the dough in a lightly oiled bowl, cover with plastic wrap and refrigerate overnight. The dough can be kept for up to 4 days and baked in batches.
Baking Day
- About 2 hours before you plan to bake, remove the dough from the refrigerator and shape into loaves. I made 3 free-form loaves over 2 days, proofing and baking them on a baking sheet fitted with a silicon mat.
- Once the loaf is shaped, brush the top with water and sprinkle with sesame seeds. Mist with spray oil, cover loosely with plastic wrap and let rise at room temperature for 90 minutes to 2 hours, or until the loaves are about 1 1/2 times their original size.
- Half an hour before the loaves are ready to bake, preheat the oven to 350°F.
- Bake the bread for 20 minutes, rotate the pan and continue to bake for another 25 to 30 minutes. The bread is ready when it’s golden brown and sounds hollow when knocked on the bottom. The first few times you make this, you might want to double check doneness with an instant-read thermometer. The internal temperature of the loaf should be 185°F (85°C). After a few tries, the colour and knock will be enough for you.
- Let the bread cool for about an hour before slicing — if you can wait that long.
Notes
Adapted from Artisan Breads Every Day by Peter Reinhart. Published by Ten Speed Press © 2009.

